How to Paint a Plastic Model Car Kit: A Step-by-Step Guide
One of the goals of building a plastic model car kit is achieving a high-quality paint job - it really is what truly brings the model to life. A well-applied paint job enhances the details and realism of your build. This guide will walk you through every step of the painting process, from preparation to finishing touches.
Our Beginner’s Guide – Tools You’ll Need To Build A Plastic Model Kit page outlines all the tools you'll need, most of which are addressed in this article.
1. Sanding for a Smooth Surface
Sanding helps remove imperfections, mold lines and ensures a smooth surface for painting.
Materials Needed:
• Fine-grit sandpaper (400-800 grit)
• Ultra-fine sanding sponge (1000-2000 grit)
• Sanding sticks
• Hobby knife (for trimming mold lines)
Steps:
1. Inspect the model for mold lines and excess plastic.
2. Use a hobby knife or sanding stick to remove excess plastic.
3. Lightly sand the entire surface with 400-800 grit sandpaper.
4. For an ultra-smooth finish, use 1000-2000 grit sanding sponges.
5. Wipe down the parts with a lint-free cloth to remove sanding dust.
2. Cleaning the Parts
Before painting, it's essential to clean the plastic model parts to remove any mold release agents, oils or dust that can interfere with paint adhesion.
Materials Needed:
• Mild dish soap or specialized model cleaner
• Warm water
• Soft toothbrush or lint-free cloth
• Air blower or paper towels
Steps:
1. Fill a basin with warm water and add a few drops of dish soap.
2. Gently scrub each part using a clean toothbrush to remove dirt, grease or dust residue from sanding.
3. Rinse thoroughly with clean water.
4. Let the parts air dry completely or use a lint-free cloth to pat them dry.
If desired, use an air blower to remove any remaining dust before painting.
3. Priming the Model
Primer creates a uniform surface and improves paint adhesion. It also highlights imperfections that may require further sanding. Note: Primer applies better in warm conditions. If needed, you can heat the can up but placing it in a bowl of warm water.
Materials Needed:
• Plastic model primer (preferably a spray)
• Masking tape (to cover areas not being primed)
• Ventilated workspace
Steps:
1. Shake the primer can well before use.
2. Hold the can about 6-8 inches away and spray in light, even coats.
3. Apply multiple thin layers rather than one thick layer.
4. Allow the primer to dry completely (check manufacturer recommendations, usually 24 hours).
Lightly sand any imperfections with ultra-fine sandpaper if needed.
4. Painting the Model
Now comes the fun part - applying the actual color to your model! Note: Paint applies better in warm conditions. If needed, you can heat the can up but placing it in a bowl of warm water.
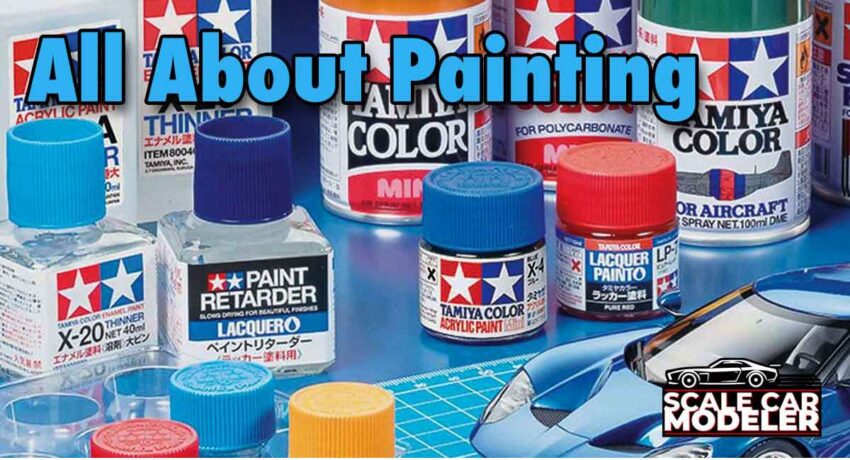
Choosing the Right Paint:
• Acrylic Paints – Water-based, dries quickly, easy to clean.
• Enamel Paints – Oil-based, provides a glossy finish but takes longer to dry.
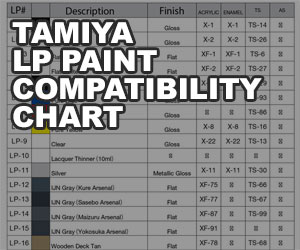
• Lacquer Paints – Quick-drying, durable but requires careful application.
Methods of Application:
Spray Paint: Best for large surfaces and even coverage.
• Apply in light coats.
• Keep the can moving to avoid buildup.
• Let each layer dry before applying the next.
Airbrushing: Offers precise control and a professional finish.
• Thin the paint as per manufacturer’s instructions.
• Use smooth, sweeping motions.
• Allow drying between coats.
Brush Painting: Ideal for small details and touch-ups.
• Use high-quality, fine brushes.
• Apply thin layers to avoid visible brush strokes.
• Allow drying before applying additional coats.
5. Applying the Decals
Decals add realism and intricate details to your model and applying them correctly ensures they look seamless under the final clear coat.
Materials Needed:
• Decal sheet
• Small dish of warm water
• Scissors for cutting them out
• Tweezers for application
• Soft brush or cotton swab
• Decal setting solution (optional, but recommended)
Steps:
1. Cut out the desired decal from the decal sheet.
2. Dip the decal in warm water for roughly 30 seconds or until it starts to loosen from the backing.
3. Using tweezers, slide the decal into to position on the model.
4. Adjust the placement using a soft brush or cotton swab.
5. Use decal setting solution to help the decal conform to the surface and remove air bubbles.
6. Let the decal dry completely before applying the clear coat.
6. Drying and Curing
Proper drying ensures the best possible finish and durability.
Tips for Drying:
• Place the model in a dust-free, well-ventilated area.
• Avoid touching the model while it dries.
• Let the paint cure for at least 24-48 hours before handling or applying additional details.
Final Steps:
• Apply a clear coat for protection and to enhance the finish.
• Allow the model to dry completely before assembling.
Frequently Asked Questions (FAQ)
Q: How do I prevent paint from dripping or pooling?
Always apply paint in thin, even coats and keep your hand moving while spraying or airbrushing.
Q: What should I do if I make a mistake while painting?
If the paint is still wet, use a cotton swab with thinner to remove it. If dry, lightly sand the mistake and repaint the area.
Q: Can I mix different types of paints?
It’s best to stick to one type of paint (acrylic, enamel or lacquer) unless you’re layering them properly (e.g., lacquer over enamel is okay, but enamel over lacquer may cause cracking).
Q: How can I achieve a glossy finish?
Use high-gloss paint, wet sand between coats and apply a clear gloss coat at the end.
Q: Should I use a primer even if my paint is the same color as the plastic?
Yes! Primer helps the paint adhere better and ensures a uniform finish.
Painting a plastic model car kit takes patience and practice, but by following these steps, you’ll achieve a professional-looking finish. Whether you’re using spray cans, airbrushing or hand painting, preparation is key. Take your time, apply thin coats and let each layer dry completely for the best results.
Happy modeling!