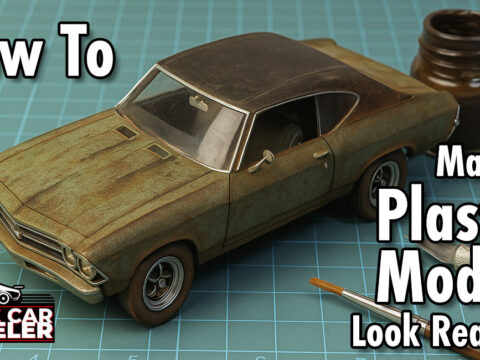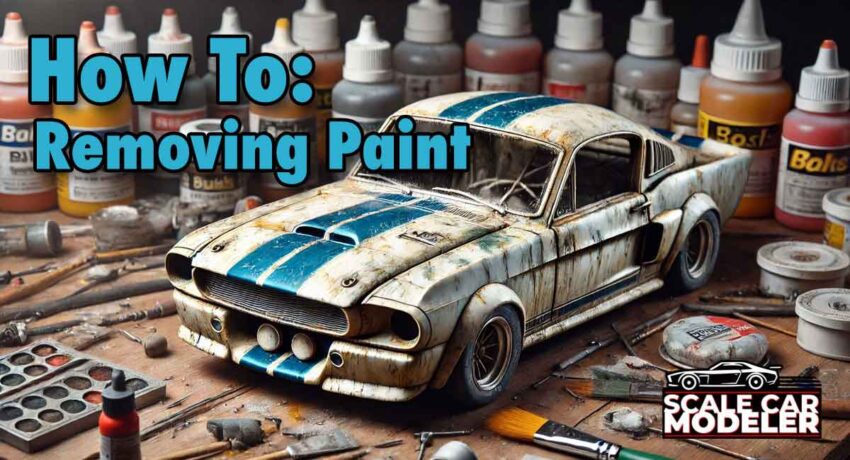
Painting a model car is one of the most satisfying parts of the hobby, but sometimes mistakes happen, or you might want to redo an old build with a fresh coat of paint. In these cases, stripping the existing paint is necessary. This guide will walk you through the reasons for removing paint, the best products to use and the most effective methods for safely stripping paint from your model car kit.
Why Remove Paint from a Model Car Kit?
There are several reasons why you might want to strip paint off a model kit:
• Fixing Painting Mistakes – If the paint job turned out uneven, has runs or developed an orange peel effect, stripping it gives you a clean slate.
• Repainting an Older Build – Over time, paint may fade, crack or you may simply want to change the color.
• Restoring a Vintage Model – If you’ve bought an old model or inherited a built kit, repainting can give it a new life.
• Removing Factory Paint – Some model kits come pre-painted and you may want to customize them with your own colors.
Recommended Paint Stripping Products & Safety Gear
Different types of paints require different stripping solutions. Here are some of the best products for removing paint from model cars and the necessary safety precautions:
1. Isopropyl Alcohol (91% or Higher)
• Works on: Acrylic-based paints
• Safe for: Most plastics
• Safety Gear Required:
- Gloves (Nitrile or Latex) – Protects skin from irritation
- Goggles – Avoids accidental eye contact
- Mask (Optional) – Helps reduce inhalation of fumes in a closed space
")
2. Brake Fluid (DOT3 or DOT4)
• Works on: Enamel and lacquer paints
• Can be harsh on: Some plastics; test before use
• Safety Gear Required:
- Chemical-resistant gloves (Nitrile or Neoprene) – Prevents skin irritation.
- Goggles or Safety Glasses – Protects eyes from splashes.
- Respirator or Mask – Avoids inhalation of fumes.
- Long-sleeve clothing – Protects skin from prolonged contact.
- Well-ventilated workspace – Avoids toxic fume buildup.
")
3. ZEP Purple Degreaser
• Works on: Acrylics, enamels and lacquers
• Safe for: Plastic
• Safety Gear Required:
- Nitrile gloves – Protects against skin irritation
- Goggles – Prevents splashes in the eyes
- Mask (Optional) – Reduces exposure to strong fumes

4. Simple Green
• Works on: Acrylics (may struggle with enamels and lacquers)
• Non-toxic and biodegradable
• Safety Gear Required:
- Gloves (Optional) – Safe for skin but can dry it out
- Goggles – Protects against accidental splashes

5. Tamiya Paint Remover
• Designed for: Hobby use
• Safety Gear Required:
- Gloves (Nitrile or Neoprene) – Protects against chemical burns
- Goggles – Prevents eye irritation
- Mask or Respirator – Reduces inhalation of strong chemical vapors

Step-by-Step Guide to Removing Paint from a Model Car Kit
Step 1: Prepare Your Work Area
• Work in a well-ventilated space or outdoors.
• Cover your workspace with newspapers or plastic sheets.
• Have running water or a sink nearby for rinsing.
• Wear all necessary safety gear based on your chosen stripping method.
Step 2: Disassemble the Model
• If possible, separate the model into smaller sections.
• Remove delicate parts like windows.
• If working on a diecast model, separate plastic parts from metal ones.
Step 3: Choose Your Stripping Method
Method 1: Soaking in Isopropyl Alcohol
1. Place plastic parts in a container filled with 91%+ isopropyl alcohol.
2. Let them soak for 4-24 hours.
3. Use a soft toothbrush to scrub off loosened paint.
4. Rinse with warm water and dry.
Method 2: Using Brake Fluid
1. Pour DOT3 or DOT4 brake fluid into a plastic container.
2. Submerge the model parts for 24-48 hours.
3. Scrub with a toothbrush to remove paint.
4. Wash thoroughly with soap and water.
Method 3: Using Super Clean or Simple Green
1. Fill a plastic tub with Super Clean or Simple Green.
2. Soak for 12-24 hours.
3. Scrub off paint with a toothbrush.
4. Rinse with warm water.
Method 5: Using Tamiya Paint Remover
1. Fill a small tub with Tamiya Painter Remover.
2. Soak parts for about ten minute, then gently scrub with a toothbrush to remove paint.
3. Rinse with warm water and dry.
Step 4: Dry and Inspect
1. Let all parts air dry completely before repainting.
2. Inspect for any leftover paint and repeat the process if needed.
Wrap Up
Stripping paint from a model car kit will require some patience and the right materials. Prioritize safety gear when working with chemicals and always work in a well-ventilated space.
Hopefully this guide will help you when restoring a classic build or fixing a painting mistake!
Happy modeling!