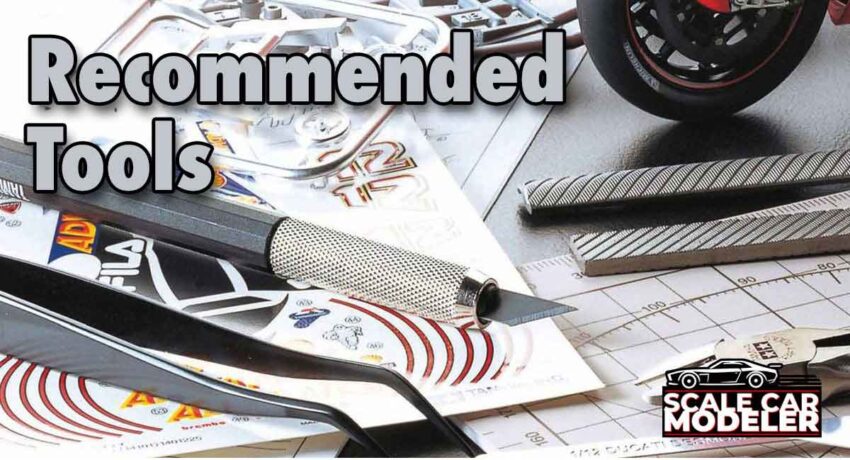
Building a plastic model car is a rewarding hobby that requires patience, precision and the right set of tools. Whether you're a beginner or an experienced modeler, having the proper equipment will make the process smoother and result in a cleaner, more professional-looking build. In this guide, we’ll cover all the essential tools you’ll need including cutting tools, adhesives, sanding equipment and cleanup supplies.
Cutting and Trimming Tools
Hobby Knife
A sharp hobby knife is essential for cutting parts from sprues, trimming excess plastic and refining details. Look for one with a comfortable handle and interchangeable blades (such as No. 11 blades).
➡ Pro Tip: Keep multiple sharp blades on hand as dull blades can cause rough cuts and damage delicate parts.
Example:
• ProTek Hobby Knife w/5 Blades
• Excel Stainless Steel Replacement Blades
Sprue Cutters (Flush Cutters or snippers)
A good pair of sprue cutters makes removing parts from the plastic sprue much easier and cleaner compared to twisting or snapping them off. Choose flush-cutting snippers designed for plastic model kits to minimize stress marks.
➡ Pro Tip: Cut parts slightly away from the connection point, then use a hobby knife to trim them flush.
Example:
• Tamiya Sharp Pointed Side Cutter
Small Scissors
Small, sharp scissors come in handy for cutting decals, masking tape or fine details from paper templates.
➡ Pro Tip: Use precision craft scissors with pointed tips for more accuracy.
Example:
• Bittydesign Straight Scissors
Razor Saw
For cutting thick plastic pieces or making modifications to body parts, a fine-toothed razor saw will provide clean, straight cuts.
➡ Pro Tip: Use masking tape as a guide to ensure straight cuts.
Example:
• Excel Razor Saw w/#5 Handle
Adhesives and Glues
Plastic Cement (Liquid or Gel Type)
Plastic cement chemically melts and fuses plastic parts together, creating a strong bond.
• Thin liquid cement is great for capillary action bonding and seamless joins.
• Gel cement is better for larger, flat surfaces where you need more working time.
➡ Pro Tip: Use a fine brush or needle applicator for precise glue application and to avoid excess buildup.
Example:
• Tamiya Extra-Thin Quick-Setting Cement
• Testors Plastic Cement
Super Glue (CA Glue - Cyanoacrylate)
Used for bonding non-plastic parts such as metal, resin or photo-etched parts. It dries quickly and forms a strong bond.
➡ Pro Tip: Use a fine applicator or toothpick to apply tiny amounts, preventing excess glue from fogging clear parts.
Example:
• ProTek CA Glue w/Glue Tip
Epoxy Glue
For high-stress joints or bonding heavy pieces, a two-part epoxy provides a stronger, more durable hold than super glue.
➡ Pro Tip: Allow full curing time (usually 24 hours) before handling bonded parts.
Example:
• Pacer Technology Zap Z-Poxy 15 Minute Epoxy
PVA Glue (White Glue or Canopy Glue)
Great for attaching clear parts, like windshields, as it dries clear and does not fog plastic.
➡ Pro Tip: Apply with a fine brush and let it dry overnight for best results.
Example:
• Speedbond PVA Glue
Sanding and Smoothing Equipment
Sanding Sticks (Emery Boards or Model Sanding Files)
Sanding sticks with different grits (coarse, medium, fine) help in removing mold lines, smoothing seams and refining surfaces.
➡ Pro Tip: Use a fine sanding stick (600-1000 grit) to smooth out edges without scratching the plastic.
Example:
• EcoPower Sanding Sticks
Sandpaper (Various Grits: 400-2000)
Wet/dry sandpaper is essential for finer finishing and polishing plastic surfaces. Use a lower grit (400-800) for shaping and higher grit (1000-2000) for polishing.
➡ Pro Tip: Wet sanding with water reduces dust and produces a smoother finish.
Example:
• EcoPower Sanding Sticks
Micro-Mesh Polishing Pads
For achieving a glass-like finish on car bodies, micro-mesh polishing pads (3000-12000 grit) are excellent for final smoothing before painting.
➡ Pro Tip: Work through the grits progressively to achieve the best shine.
Example:
• Micro-Mesh Soft Touch Polishing Pads
Putty and Seam Fillers
Plastic model putty (e.g., Tamiya Putty or Mr. Surfacer) fills gaps and imperfections in model seams before sanding.
➡ Pro Tip: Apply putty sparingly and let it dry before sanding for a seamless finish.
Example:
• Tamiya Putty
Clamping and Holding Tools
Tweezers
Precision tweezers help with handling small parts, decals and photo-etched components without damaging them.
➡ Pro Tip: Choose anti-static or soft-tipped tweezers to avoid scratching delicate parts.
Example:
• Tamiya Straight Tweezers
• Tamiya Angled Tweezers
Clamps and Clips
Mini clamps, alligator clips or clothespins are useful for holding parts together while glue dries.
➡ Pro Tip: Wrap the tips of clamps with tape to prevent denting plastic parts.
Example:
• Mr. Almighty Mini Clip Stick
Rubber Bands & Masking Tape
Used to hold large sections together while cement dries without applying too much pressure.
➡ Pro Tip: Use low-tack masking tape to avoid leaving residue on painted surfaces.
Example:
• Tamiya 6mm Masking Tape
• Tamiya 10mm Masking Tape
• Tamiya 18mm Masking Tape
• Guillows Rubber Bands
Painting and Finishing Tools
Paint Brushes (Various Sizes and Shapes)
Small, high-quality synthetic or sable brushes are great for detail painting. Flat brushes work well for larger areas.
➡ Pro Tip: Use a separate brush for metallic and non-metallic paints to avoid contamination.
Example:
• Paint Brushes - Various Sizes
Airbrush and Compressor (Optional for Advanced Modelers)
An airbrush provides a smooth, professional-looking finish compared to rattle cans or hand brushing.
➡ Pro Tip: Use a dual-action airbrush for better control over paint flow.
Example:
• Grex Airbrush Combo
Masking Tape (Tamiya Tape or Painter’s Tape)
Essential for masking areas when painting different colors or adding stripes.
➡ Pro Tip: Use a burnishing tool to ensure crisp paint lines.
Example:
• Tamiya 6mm Masking Tape
• Tamiya 10mm Masking Tape
• Tamiya 18mm Masking Tape
Cleanup and Maintenance Tools
Cotton Swabs & Micro Brushes
Perfect for applying weathering effects, cleaning up paint spills or removing excess glue.
➡ Pro Tip: Use precision-tip swabs for reaching small spaces.
Example:
• Tamiya Craft Cotton Swab - Small
• Tamiya Craft Cotton Swab - Medium
Isopropyl Alcohol (IPA) or Lacquer Thinner
Used for cleaning brushes, airbrushes and removing paint mistakes.
➡ Pro Tip: Always use proper ventilation when working with solvents.
Example:
• Tamiya Lacquer Thinner
Paper Towels and Soft Cloths
Used for drying parts after cleaning or polishing finished models.
➡ Pro Tip: Microfiber cloths help prevent scratches on glossy finishes.
Example:
• Scott Blue Shop Towels
FAQ: Common Questions About Model Car Building Tools
Q: Do I need all these tools to start building a model car?
Absolutely not! Beginners can start with basic tools like a hobby knife, sprue cutters, plastic cement and sandpaper. As you progress, you can invest in more specialized tools.
Q: What is the best way to remove parts from the sprue without damaging them?
Use a high-quality sprue cutter and cut slightly away from the connection point. Then, trim the remaining nub with a sharp hobby knife and sand smooth.
Q: How do I prevent glue from fogging clear plastic parts like windows?
Use PVA glue (such as Micro Kristal Klear) instead of super glue, as CA glue releases fumes that fog clear plastic.
Q: What’s the difference between liquid plastic cement and super glue?
• Plastic cement chemically bonds plastic by melting the surfaces together.
• Super glue (CA glue) is a general-purpose adhesive that works on plastic, metal and resin but doesn’t create a chemical bond.
Q: Why do I need different grits of sandpaper?
Different grits serve different purposes:
• 400-600 grit: For heavy sanding and removing mold lines.
• 800-1200 grit: For smoothing surfaces before painting.
• 2000+ grit: For polishing and achieving a glossy finish.
Q: How do I keep my paint brushes in good condition?
Clean them immediately after use with appropriate solvents (water for acrylics, mineral spirits for enamels), reshape the bristles and store them bristles up.
Q: Can I use household super glue instead of hobby-grade CA glue?
Yes, but hobby-grade CA glues often have finer tips for precision application and are available in different viscosities (thin, medium, thick) for better control.
Q: What should I use to hold small parts while painting?
Tweezers, alligator clips on sticks or helping hands (a stand with adjustable clips) are great for securing parts while painting.
Q: Why is wet sanding better than dry sanding?
Wet sanding prevents excessive dust, reduces scratches and results in a smoother finish, making it ideal for prepping a model for painting.
Q: Can I use nail files instead of sanding sticks?
Yes! Emery boards (nail files) work well as budget sanding sticks, though model-specific sanding sticks offer a wider range of grits.
Having the right tools for building a plastic model kit makes a significant difference in the quality of your work. Investing in good-quality cutters, adhesives, sanding materials and cleanup tools will improve your build process and final result. Whether you're a beginner or an expert, these tools will help you achieve a clean, professional finish on your model car projects.
Happy modeling!