Building model cars requires precision, patience and - most importantly - the right glue. Whether you’re assembling a plastic model kit, reinforcing a structural bond or working with mixed materials, choosing the right adhesive can make or break your project. Below, we’ll go over four of the most common types of glue used in model car building: plastic cement, super glue (CA), epoxy glue and PVA glue, explaining their uses and application techniques.
1. Plastic Cement (Polystyrene Cement)
Best For:
• Plastic model kits made from polystyrene or ABS
• Strong, permanent bonds for model car parts
• Large, flat joints that need a seamless connection
How It Works:
Plastic cement is a solvent-based adhesive that chemically melts and fuses plastic parts together, creating an ultra-strong bond. It’s perfect for assembling model car bodies and other polystyrene components because it forms a true weld rather than just sticking the pieces together.
Application Tips:
✅ Use a Brush or Needle Applicator – Many modelers prefer liquid plastic cement applied with a fine brush or needle applicator to avoid excess glue.
✅ Avoid Smearing – Since it softens plastic, moving parts around too much can create ugly seams. Apply and hold parts steady until set.
✅ Clamp or Hold Firmly – Plastic cement takes a few seconds to dry, so keeping parts clamped or steady for a few minutes helps ensure a strong bond.
✅ Clean Joints Before Application – A light sanding or cleaning with isopropyl alcohol removes mold release agents and dust, improving adhesion.
✅ Use Slow-Setting Variants for Large Parts – Some brands offer fast or slow-setting formulas; slow-setting cement is better for large, tricky assemblies.
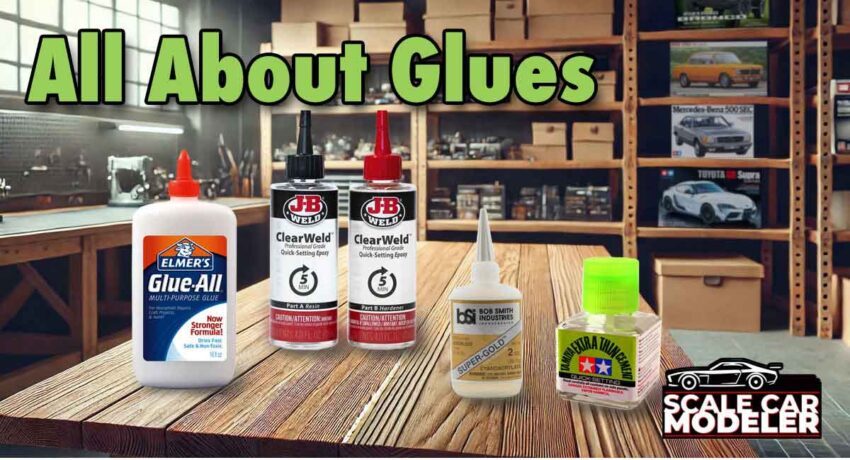
Recommended Brands:
• Tamiya Extra Thin Cement
• Tamiya Extra Thin Quick Setting Cement
• Testors Liquid Cement
• Revell Contacta Professional
2. Super Glue (CA - Cyanoacrylate Adhesive)
Best For:
• Quick repairs and spot-gluing
• Metal, resin, rubber or mixed-material model parts
• Small, delicate parts that need instant adhesion
How It Works:
Super glue is a fast-acting adhesive that bonds instantly to surfaces by reacting with moisture. It works well for non-plastic parts in model cars or when you need a fast, strong bond for small details.
Application Tips:
✅ Use the Right Viscosity – CA glue comes in thin, medium and thick viscosities. Thin CA is great for wicking into tight spaces while thick CA gives you more working time.
✅ Use Accelerator for Instant Curing – A CA accelerator (sometimes called "kicker") can speed up drying time, especially useful for metal and resin parts.
✅ Avoid Cloudy White Residue – Super glue fumes can leave a white film on clear plastic (like windshields). Use a ventilated space and apply sparingly to avoid fogging.
✅ Be Careful with Excess Glue – CA glue bonds skin instantly, so use tweezers for small parts and apply with a fine needle or toothpick for precision.
✅ Store in a Cool, Dry Place – Keep CA glue sealed and in a fridge or airtight container to extend shelf life.
Recommended Brands:
• Bob Smith Industries (BSI) Super Gold CA
• ProTek Ultra CA
• Gorilla Super Glue
3. Epoxy Glue
Best For:
• Heavy-duty bonding (metal, resin or large structural parts)
• Strengthening weak or repaired sections
• Attaching weights or ballast inside model cars
How It Works:
Epoxy glue consists of two parts - resin and hardener - that must be mixed before application. Once mixed, it creates an incredibly strong bond with a longer working time than CA glue.
Application Tips:
✅ Mix Precisely – Follow the exact ratio of resin to hardener, typically 1:1, for best results.
✅ Use in Small Batches – Mixed epoxy has a limited working time (usually 5-30 minutes), so only mix what you can use before it starts curing.
✅ Clamp for Best Strength – Holding parts together with clamps or tape while epoxy cures will result in the strongest bond.
✅ Choose the Right Set Time – 5-minute epoxy is great for quick repairs, but 24-hour epoxy cures harder and stronger.
✅ Sand for Better Grip – Lightly sanding metal or resin surfaces before applying epoxy improves adhesion.
Recommended Brands:
• J-B Weld ClearWeld
• Devcon 2-Ton Epoxy
• Gorilla 5-Minute Epoxy
4. PVA Glue (White Glue)
Best For:
• Clear parts like windows and headlights
• Temporary bonds or removable applications
• Paper, fabric or diorama elements
How It Works:
PVA glue is a water-based adhesive that dries clear and remains slightly flexible. It’s not as strong as the other glues but is perfect for attaching delicate parts that need a non-permanent bond.
Application Tips:
✅ Use for Clear Parts – PVA glue won’t damage or fog clear plastic like CA glue. Apply sparingly with a brush or toothpick.
✅ Thinning for Precision – You can thin PVA glue with water for finer applications or to reduce glue buildup.
✅ Removable with Water – Since PVA glue is water-soluble before drying, you can remove mistakes with a damp cloth.
✅ Allow Ample Drying Time – PVA glue takes longer to dry than CA or epoxy, so be patient before handling the part.
Recommended Brands:
• Elmer’s White Glue
• Aleene’s Tacky Glue
• Mod Podge (for sealing diorama elements)
Which Glue Should You Use? A Quick Reference Chart
| Material | Plastic Cement | Super Glue (CA) | Epoxy Glue | PVA Glue |
|---|---|---|---|---|
| Plastic to Plastic | ✅ Best Choice | ⚠️ Only for quick fixes | ❌ Not recommended | ❌ No hold |
| Metal to Plastic | ❌ Won't bond | ✅ Good | ✅ Best Choice | ❌ No hold |
| Resin to Plastic | ❌ Won't bond | ✅ Good | ✅ Best Choice | ❌ No hold |
| Clear Plastic (Windows) | ✅ Works, but use carefully | ⚠️ Risk of fogging | ❌ Too strong | ✅ Best Choice |
| Rubber Tires | ❌ Won't bond | ✅ Best Choice | ❌ Too rigid | ❌ No hold |
| Paper/Fabric | ❌ Not effective | ❌ Too brittle | ❌ Overkill | ✅ Best Choice |
Final Thoughts
By using the right adhesive for each situation—and applying it carefully—you’ll get stronger, cleaner, and more precise results on every model car build.
Happy modeling!