
Tamiya Cement Guide: Standard, Extra Thin and Quick-Setting Compared

Tamiya Cement Guide: Standard, Extra Thin and Quick-Setting Compared

Walk into the glue section of a hobby shop and things can get confusing surprisingly fast.

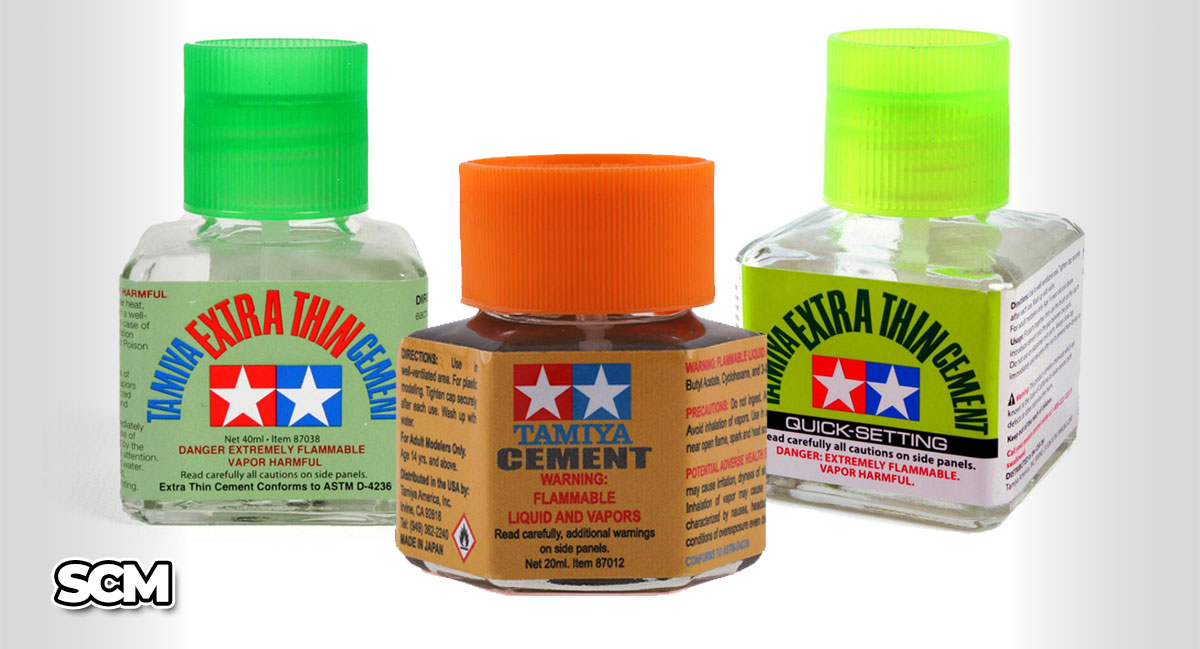
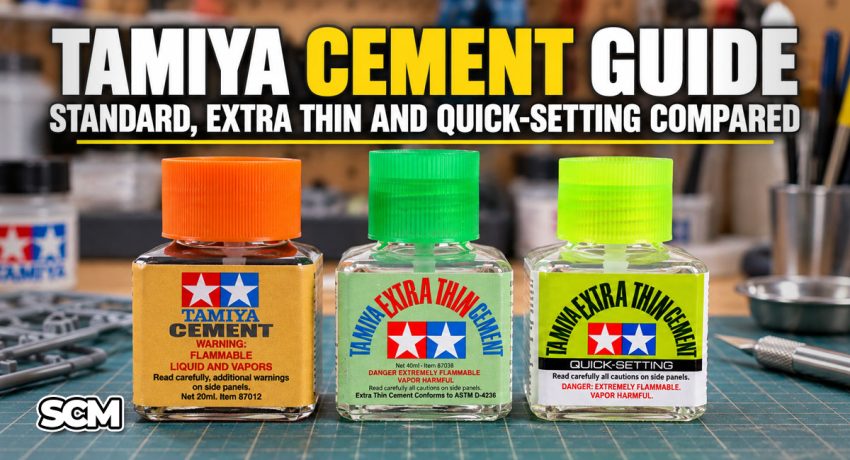
Even if you decide to stick with Tamiya products, you'll probably find several bottles that appear to do basically the same job. There's Tamiya Plastic Cement, Tamiya Extra Thin Cement and Tamiya Extra Thin Cement Quick-Setting.

They're all designed to stick plastic model parts together, so why are there three?

Because they don't work the same way.

The biggest difference isn't simply how quickly they dry. Each cement has a different consistency and working time, which changes how you use it and which modeling jobs it handles best.

Standard Tamiya Plastic Cement gives you more time to position parts and works well when you want to apply cement before joining them. Extra Thin is designed to flow between parts that are already being held together. Quick-Setting takes that same capillary-action technique and dramatically reduces the setting time.

For most Scale Car Modelers, there isn't really one "best" Tamiya cement. In fact, having two or even all three on your workbench can make building easier.

Let's look at what makes them different.

How Does Plastic Model Cement Work?

Before comparing the three types, there's something important to understand about plastic cement.

It isn't quite the same thing as regular household glue.

When you're assembling a typical polystyrene model kit, plastic cement softens the surfaces of the plastic where it is applied. Press the pieces together and those softened surfaces bond together as the solvent evaporates.

You can think of it as creating a tiny welded joint between the pieces.

That's one reason plastic cement can create such strong joints on styrene models. You're not simply putting a layer of adhesive between two surfaces.

This also explains why plastic cement needs to be treated carefully. If it gets onto a visible surface, it can soften that surface too. Touch the softened plastic and you may leave a fingerprint, smear or other permanent mark.

Learning to control where the cement goes is therefore just as important as choosing the right cement.

Which Tamiya Cement Should I Use?

Here's the quick version.

CementConsistencyWorking TimeHow It's Usually AppliedBest For
Tamiya Plastic CementThickerLongestApply cement, then join partsLarger parts, positioning parts, beginners
Tamiya Extra Thin CementVery thinMediumHold parts together, then touch cement to seamBody parts, chassis pieces, long seams, precise assembly
Tamiya Extra Thin Quick-SettingVery thinVery shortHold parts together, then touch cement to seamSmall parts, fast assembly, well-fitting joints

Tamiya lists a working time of approximately 1–2 minutes for its standard Plastic Cement, with a full cure taking about 24 hours.

Standard Extra Thin works much faster. Tamiya designed it specifically to flow into the small spaces between plastic parts that have already been fitted together.

Quick-Setting takes that concept even further. According to Tamiya, it typically dries in under 10 seconds compared with about 40 seconds for standard Extra Thin.

That doesn't necessarily make Quick-Setting better.

It simply makes it better for certain jobs.

Tamiya Plastic Cement: The Standard Choice
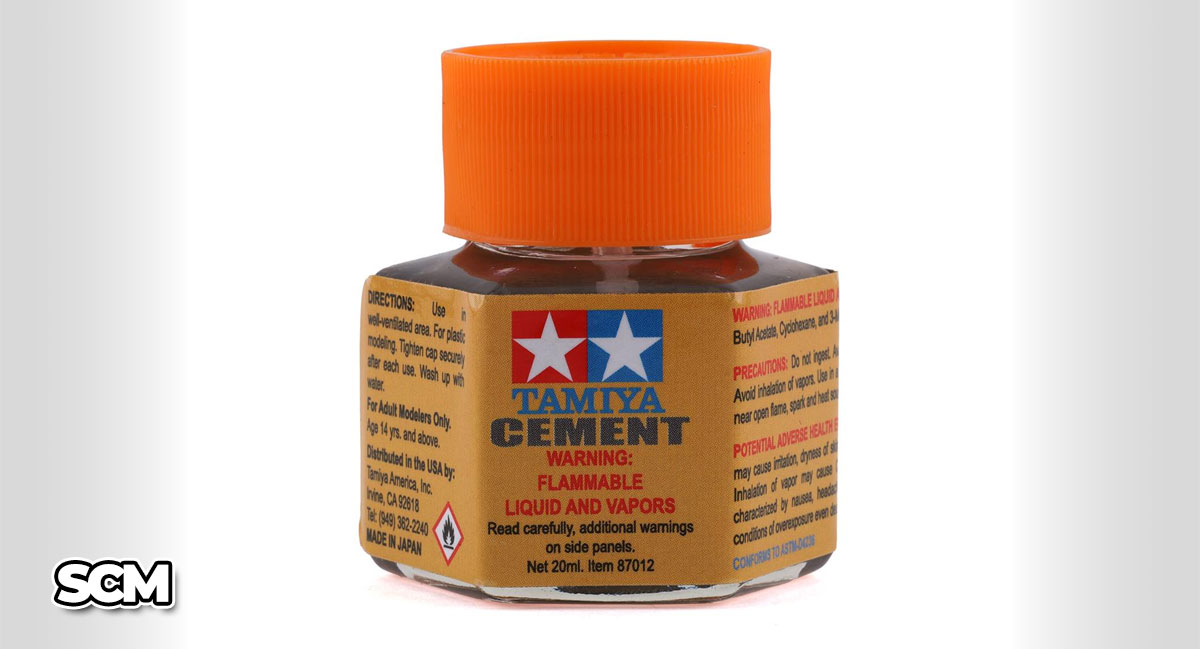
Tamiya Plastic CementTamiya Plastic Cement is the most traditional of the three.

The 20ml version, Item 87012, comes in the familiar orange-capped hexagonal bottle with an application brush attached to the cap.

Compared with Extra Thin, standard cement has more body to it and stays workable longer.

That longer working time can be extremely useful.

Imagine you're assembling an engine block from two halves. You can brush cement along the mating surfaces, bring the pieces together, line everything up and make small adjustments before the cement begins to grab firmly.

The same applies to larger suspension components, interior pieces and other parts that may require a little positioning.

When Standard Tamiya Cement Works Best
Standard cement is a good choice when:

• You need time to align the pieces
• You're joining relatively large surfaces
• You want cement to stay where you brush it
• The joint isn't tight enough for capillary action to work well
• You're still learning how plastic cement behaves

That last point makes standard cement especially useful for beginners.

Extra Thin can actually be easier to apply once you understand the technique, but its ability to run into tiny spaces can also get a new builder into trouble very quickly.

Standard cement is generally more predictable.

Brush a small amount onto the mating surface, join the pieces and adjust them.

Simple.

The Disadvantage of Standard Cement
The thicker consistency also means you need to be more careful about using too much.

If you load the brush and paint a heavy layer across the plastic, excess cement can squeeze out when the parts are pressed together.

Sometimes a small amount of softened plastic squeezing from a seam can actually be useful because it can help create a solid joint that can later be sanded smooth.

A large blob of cement running down the side of a beautifully molded body panel is considerably less helpful.

Use enough to wet the mating surfaces. You don't need to flood them.

Tamiya Extra Thin Cement: The Modeler's Favorite
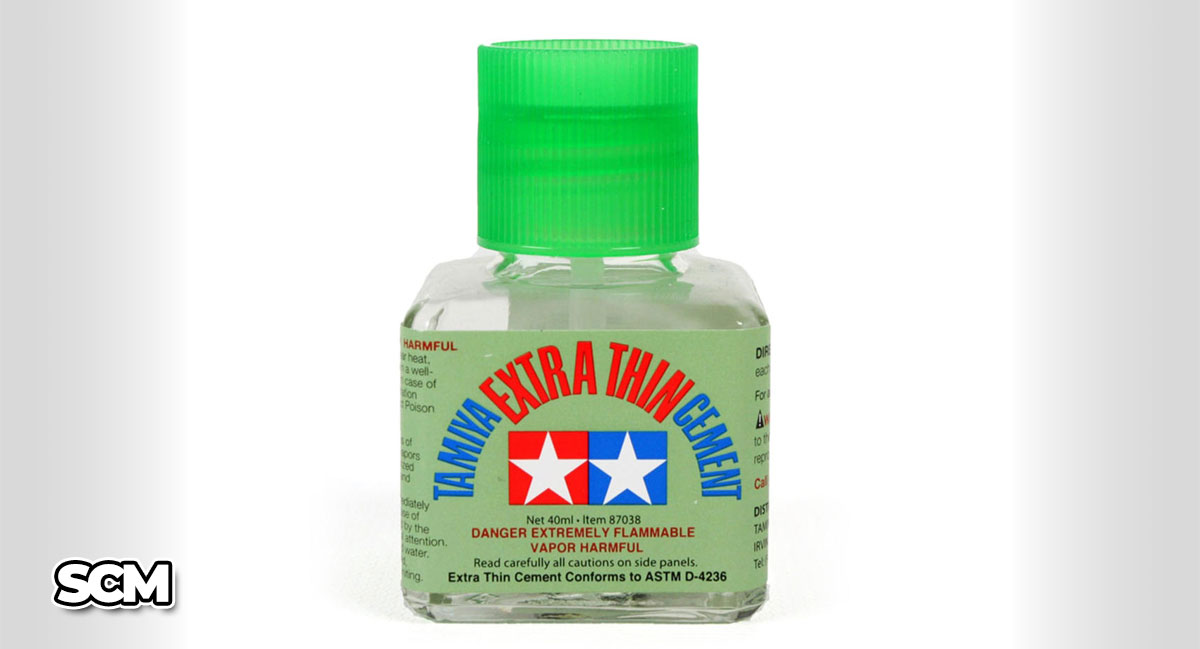
Tamiya Extra Thin CementTamiya Extra Thin Cement, Item 87038, uses a completely different application technique.

Instead of brushing cement onto a part and then assembling it, you generally fit the parts together first.

Hold the pieces in their correct position.

Then touch the applicator brush to the seam.

The cement flows along the joint through capillary action.

This is the magic of Extra Thin.

You don't need to paint cement along an entire seam. Touching the brush at a few points may allow the liquid to travel surprisingly far between two tightly fitted pieces.

For Scale Car Modeling, this makes Extra Thin incredibly useful.

Body components, chassis assemblies, engine parts, suspension pieces and other precisely molded parts can often be fitted together first and cemented afterward.

Why Extra Thin Gives Such Clean Results
Because the cement travels between the pieces, there's often much less adhesive sitting on the visible surface.

That's particularly useful when dealing with long seams.

Imagine assembling two halves of an engine, transmission or exhaust component.

Fit the halves together and make sure they're aligned. Then touch Extra Thin to the seam and allow it to flow along the joint.

Hold the parts together while the cement begins working.

You get a strong joint without having to brush a thick layer of cement over the entire mating surface beforehand.

Extra Thin Still Gives You Some Working Time
This is one reason regular Extra Thin remains so useful even though a faster version exists.

Tamiya states that standard Extra Thin dries in roughly 40 seconds after application.

That isn't a huge amount of time, but it gives you some opportunity to make minor corrections.

For many scale model projects, that's a nice middle ground.

It's fast enough that you aren't holding parts together forever but slow enough that a slightly crooked component doesn't immediately become a permanent feature of your model.

Tamiya Extra Thin Quick-Setting: When Speed Matters
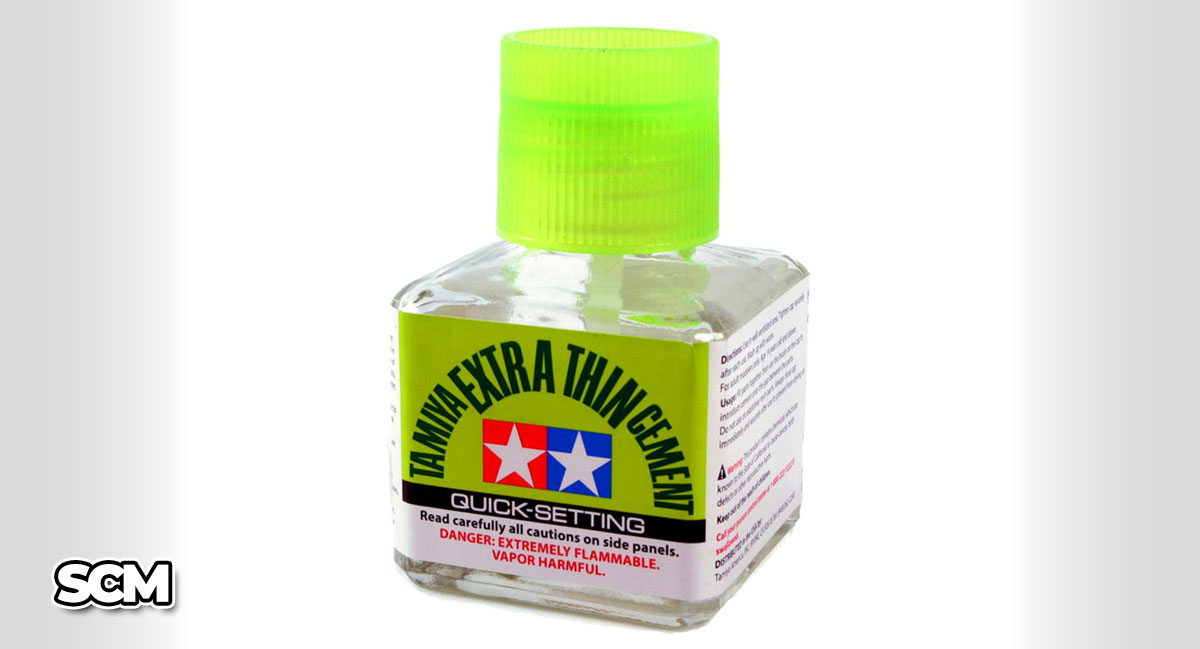
Tamiya Extra Thin Cement Quick-SettingTamiya Extra Thin Cement Quick-Setting, Item 87182, looks similar to regular Extra Thin, but don't assume they're interchangeable.

The Quick-Setting formula dries approximately four times faster than standard Extra Thin. Tamiya says it typically dries in under 10 seconds.

That can be fantastic - it can also be slightly terrifying if the part isn't where you want it.

Quick-Setting is best used when you're confident about the fit of the pieces before the brush ever touches the model.

Fit the parts.

Check the alignment.

Check it again.

Then apply the cement.

The very thin liquid flows into the joint just like regular Extra Thin, but the bond develops much faster.

Where Quick-Setting Really Shines
Small parts are a great example.

Suppose you're installing a suspension component that fits positively into a locating point. You know exactly where it belongs and don't need much adjustment.

Hold it in position, touch Quick-Setting to the joint and you're done.

It's also handy during repetitive assembly where you're confident about the fit.

Instead of holding every component for an extended period, Quick-Setting lets you move through the assembly process faster.

Tamiya also notes that Quick-Setting has less tendency to seep out from joints than regular Extra Thin, which can help produce cleaner results.

When You Should NOT Use Quick-Setting
Quick-Setting isn't ideal when you need time to adjust alignment.

A large body component that requires careful positioning? Regular Extra Thin or standard cement may be safer.

A suspension assembly where several components need to line up simultaneously? Give yourself some working time. Quick-Setting rewards preparation. It isn't particularly forgiving of improvisation.

Practical Walkthrough: Building a 1/24 Scale Car
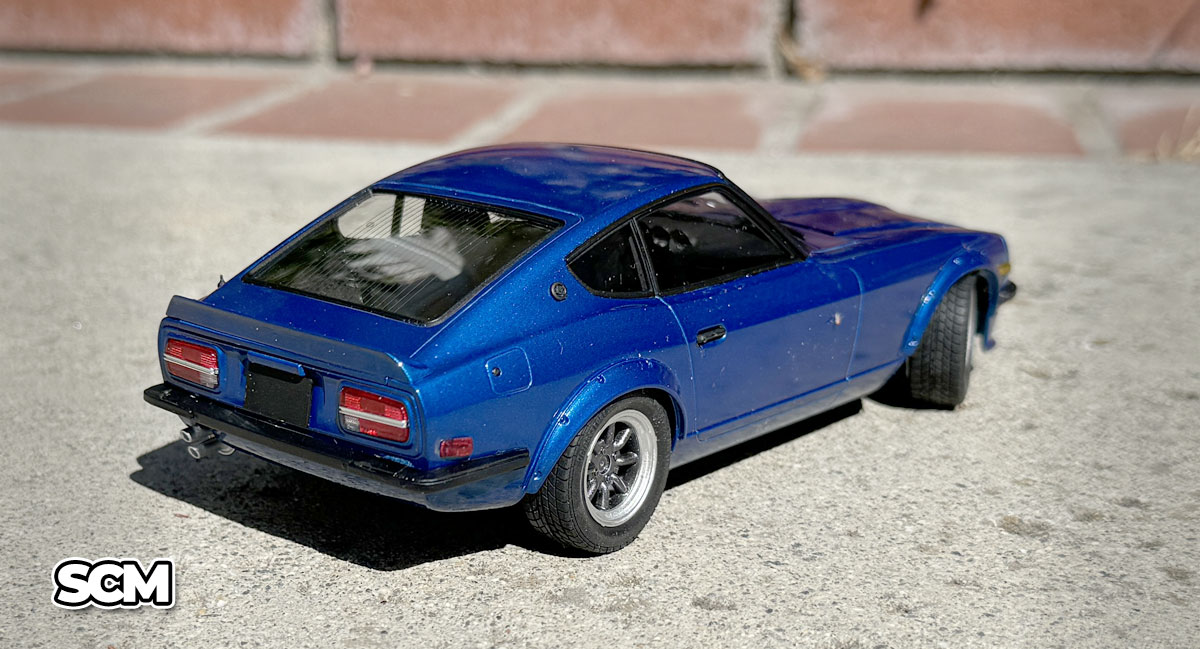
Practical Walkthrough: Building a 1/24 Scale Car

Let's put all three bottles on the bench and build part of a typical 1/24 scale car.

You don't have to switch cement every five minutes, but these examples show where each type can be useful.

Step 1: Engine Assembly
Many model car engines consist of two main block halves.

Test-fit them first.

If the halves need some adjustment or don't fit perfectly, standard Tamiya Plastic Cement is a good choice.

Brush a thin coat onto the mating surfaces, press the halves together and align them carefully.

If the parts fit very tightly, regular Extra Thin is another excellent option. Hold the halves together and touch the brush along the seam.

Capillary action will pull cement into the joint.

Step 2: Chassis Components
Large suspension or chassis pieces sometimes need a little positioning.

This is where standard cement's longer working time can be useful.

Apply a small amount, install the part and make sure it's sitting square.

Before the cement fully sets, check the model from several angles.

A suspension arm that's slightly crooked may not seem important now, but it can become very obvious when one wheel sits differently from the other three.

Step 3: Joining a Long Seam
Suppose the kit includes a multi-piece exhaust, transmission or another component with a long seam.

Regular Extra Thin is excellent here.

Fit the pieces tightly together and touch the brush to the seam.

Watch the cement travel along the joint.

You can move along the seam a section at a time rather than covering everything at once.

Step 4: Small Detail Parts
Now you're attaching a small bracket or other detail that has a clear locating point.

This is where Quick-Setting can save time.

Dry-fit the part first.

Once you're confident that it fits correctly, hold it in position and touch a tiny amount of Quick-Setting to the joint.

The fast setting time means you don't have to sit there holding a tiny plastic piece with tweezers while wondering why you chose a hobby requiring this much patience.

Step 5: Body Components
Body parts deserve extra caution because any cement damage will be very visible later.

Regular Extra Thin can work beautifully for parts that fit into defined locations and can be cemented from behind.

Whenever possible, apply cement from the inside or hidden side of the body.

This reduces the chance of damaging an exterior surface that will eventually receive your carefully prepared paint job.

Seven Common Tamiya Cement Mistakes

Plastic cement isn't difficult to use, but a few mistakes can quickly turn into extra sanding, filling and colorful language.

1. Using Too Much Cement
More cement doesn't necessarily produce a stronger joint. It mostly produces more opportunities for cement to escape onto visible surfaces.

Start small.

You can usually add another tiny amount if necessary.

2. Touching Plastic That Has Cement On It
This is a classic.

You accidentally get Extra Thin on a visible surface and instinctively try to wipe it away.

Don't.

The cement has softened the plastic. Touching or wiping it can turn a small wet spot into a fingerprint or smeared mess.

If possible, leave it alone and allow it to completely dry. You can then evaluate whether the area needs sanding or other repair.

3. Putting Extra Thin On Before Joining the Parts
Extra Thin is designed primarily around capillary action.

For many joints, the better technique is:
Fit first. Cement second.

Hold the pieces together and then touch the applicator to the seam.

4. Not Dry-Fitting First
Always test-fit important components before cementing them.

This is particularly important with Quick-Setting.

Once you know how the pieces locate and where pressure needs to be applied, gluing them becomes much easier.

5. Using Plastic Cement on Painted Surfaces
Plastic cement works best when it can reach bare plastic.

Paint between the two pieces can interfere with the bond because the cement is interacting with the paint layer rather than getting clean access to the plastic beneath it.

Scrape paint from hidden mating surfaces before assembly when necessary.

You also want to avoid spilling cement onto finished paint because the solvent can damage the finish.

6. Using Regular Plastic Cement for Everything
Plastic cement is excellent for polystyrene model parts, but it isn't a universal adhesive.

Metal photo-etched parts, some types of rubber, resin components and other materials may require a different adhesive such as cyanoacrylate (CA) glue.

Tamiya specifically warns that its Extra Thin Quick-Setting cement should not be used on elastomer parts because it can cause brittleness.

Check the material you're working with before assuming your normal plastic cement will work.

7. Using Plastic Cement on Clear Parts Without Care
Windshields, side windows and headlight lenses deserve special treatment.

Solvent cement can damage or mar clear plastic if it reaches a visible area.

If you use plastic cement around clear parts, use an extremely small amount and apply it only where the joint will be hidden.

Many modelers prefer adhesives specifically suited to clear parts (Elmer's Glue does wonders) when installing windows and lenses because mistakes are much less forgiving on transparent plastic.

Do You Need All Three?

Tamiya CementsNo.

If you're building your first model car, you don't need to buy every type of cement Tamiya makes.

If you want one versatile bottle, regular Tamiya Extra Thin Cement is an excellent starting point once you understand the fit-first, cement-second technique.

If you're brand new to modeling and prefer a more traditional glue application method, standard Tamiya Plastic Cement is very forgiving and gives you considerably more positioning time.

As your skills improve, Quick-Setting becomes a useful addition.

Personally, I'd rather think of these as different tools instead of competing products.

You wouldn't ask whether a flat screwdriver is "better" than a Phillips screwdriver. The answer depends on the screw.

Cement works much the same way.
FAQ

Q: What is the difference between Tamiya Cement and Tamiya Extra Thin Cement?
The biggest differences are consistency and application technique.

Standard Tamiya Plastic Cement is thicker and provides more working time. You can brush it onto a mating surface and then join the pieces.

Extra Thin is a very low-viscosity cement designed to flow into the narrow space between parts through capillary action. You normally fit the pieces together first and then touch the cement brush to the seam.

Q: Is Tamiya Extra Thin stronger than regular Tamiya Cement?
It is better to choose between them based on the type of joint rather than assuming one is universally stronger.

Both are intended to create strong bonds in compatible plastic model parts. The major practical difference is how the cement reaches the joint and how much working time you have.

Good surface contact and proper application matter enormously.

Q: Is Tamiya Extra Thin Quick-Setting better than regular Extra Thin?
Not necessarily.

Quick-Setting is faster, but faster isn't always better.

Tamiya states that Quick-Setting typically dries in under 10 seconds while standard Extra Thin takes around 40 seconds. Regular Extra Thin therefore gives you more time to adjust the parts.

Quick-Setting is best when you're already confident that the parts are positioned correctly.

Q: How long does Tamiya Cement take to dry?
It depends on the type.

Tamiya lists a working time of approximately 1–2 minutes for its standard 20ml Plastic Cement and says it fully cures in 24 hours.

Tamiya states that regular Extra Thin dries in approximately 40 seconds after application, while Extra Thin Quick-Setting typically dries in under 10 seconds.

Keep in mind that "dry" or initially set isn't necessarily the same thing as reaching maximum strength. Avoid putting unnecessary stress on freshly cemented joints.

Q: Why does Tamiya Extra Thin run along the seam?
Capillary action pulls the low-viscosity cement through the tiny space between two closely fitted pieces.

That's exactly what Extra Thin is designed to do.

Instead of brushing cement across the entire joint, you can hold the pieces together and allow the cement to flow between them.

Q: Can I use Tamiya Cement on painted parts?
You can assemble painted parts, but cement should ideally contact bare plastic at the actual mating surfaces.

If necessary, scrape paint from hidden attachment points before cementing.

Be especially careful around visible painted areas because plastic cement can damage the finish.

Q: Can I use Tamiya Cement on clear plastic?
It can bond compatible clear plastic, but solvent cement can easily damage the appearance of windows, windshields and lenses.

Use extreme care and very small amounts around clear parts. Depending on the application, an adhesive specifically intended for clear parts may be the safer choice.

Q: Can Tamiya Cement glue metal parts?
Standard plastic cement is designed primarily for compatible plastics such as polystyrene. It isn't the correct adhesive for most metal-to-plastic or metal-to-metal joints.

Photo-etched details and other metal components generally require an adhesive such as CA glue.

Q: Why did Tamiya Extra Thin leave a fingerprint on my model?
Extra Thin softens polystyrene as part of the bonding process.

If cement gets onto your finger and you touch the model, or if you touch an area where cement has spilled, your fingerprint can become impressed into the softened plastic.

Keep your fingers away from wet cement and resist the temptation to wipe a spill immediately.

Q: Which Tamiya cement should a beginner buy first?
For many scale car builders, regular Tamiya Extra Thin Cement is probably the most versatile first choice.

The technique takes a little practice, but once you learn to fit the pieces together first and let capillary action draw the cement into the joint, it becomes extremely easy to control.

If you prefer more working time or the traditional method of applying cement before joining parts, standard Tamiya Plastic Cement is also an excellent beginner option.

Share: